 Sarah Lynne Reul
happy halloween!
Posted on October 31, 2011
Here’s a creepy facial muscle study to celebrate:
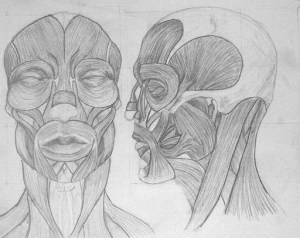 |
| graphite on 11″ x 14″ sketch pad |
portraits
Posted on October 29, 2011
Starting in week 6 of my figure drawing class, we began to focus on portraits. Here are my three – they took me 1.5 to 2 hours each and were done with prismacolor pencil or graphite on an 11″ x 17″ sketchbook.
 |
| here’s the original photo for this one |
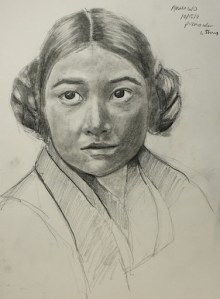 |
| Vintage portrait from flickr |
 |
| Clark Gable from this original photo |
foreshortened figures
Posted on October 27, 2011
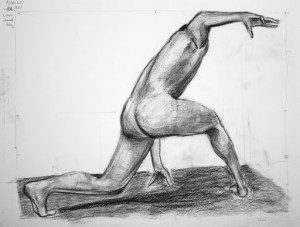
Here are a couple of drawings from week 5 of my figure drawing class – we were focusing on foreshortening (where parts of the body look smaller or larger depending on how far they are from the viewer). These took about 2 hours each to complete.
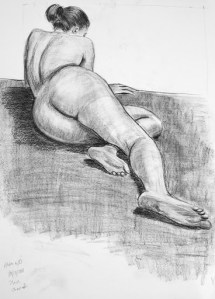 |
| These are both charcoal, on 18″ x 24″ newsprint, from photos provided by the instructor |
pose change animation
Posted on October 20, 2011
Here’s the animation assignment from last week – I’m catching up! We had to create 3 key poses, and animate in between them. Although I spent a long time on this assignment I don’t love the result – I didn’t put much into the character design and it shows.
When changing poses, it’s best to have an interesting action in between the two main poses – for example, if a character will be reaching out to point at something, you could bring the hand back first, in anticipation of the point forward. Otherwise you get a weird mechanical, morphing effect – which I happened to do on this assignment. Watch the movie a couple times – you’ll notice that as he’s sitting up he sort of morphs into the lean forward; I much prefer the settle back because I managed to get him to turn the opposite way a bit before settling back into the shocked expression.
Oh well. Better luck next time.
arm & leg muscle anatomy
Posted on October 20, 2011
Our figure drawing class has been focusing on muscle anatomy over the last couple weeks – here are the drawings I submitted for arm & leg schematics –


fishwife pencil test
Posted on October 20, 2011
Oh my, I am behind again on posting. This animation was for an assignment two weeks ago – we had to demonstrate a “stagger” animation, defined as kind of a shaking motion when someone is under stress (pulling/pushing/lifting something heavy), or if they’re shivering from cold or quivering from anger. The best way to animate this is to draw a series of frames with a nice, smooth arc of action, and then shuffle up the drawings.
I had fun designing this fishwife attempting to lift a huge fish. I filmed myself acting out the motion, pretending a pillow was the fish… I had originally planned for this to be about 15 seconds longer, but once I started plotting out the action on an exposure sheet (aka xsheet) I realized how ridiculous that was. It’s a big shift to start thinking in terms of seconds – as it is this film’s about 9 seconds long and it probably took me at around 8 hours to do from character design to final version.
You’ll notice that her features kind of disappear in the middle… the assignment was to get the overall motion down so I didn’t have time for the details.
Here are some of the initial character design sketches:

head turn animation!
Posted on October 11, 2011
Sorry for the delay! This week was a little crunched for time, so the blog posting got up late.
Note how the ears drag behind and then fall forward as the head turns one way, then does the same on the way back.
Then for the limited animation, I made a monster (they’re so versatile):
This one took way less time – rather than moving in perspective like the fish bunny, the monster’s head just pops over from one side to the next. Most cartoons made for TV are limited/stylized animation, since the production time is way shorter.
I'm an illustrator and 2D animator who likes lots of stuff, including science, bright colors and figuring out how things work.

_06.jpg)